Le basi: differenze tra le versioni
| (90 versioni intermedie di 6 utenti non mostrate) | |||
| Riga 1: | Riga 1: | ||
[[Category: | [[Category:Aiuto]] | ||
= | === Razze=== | ||
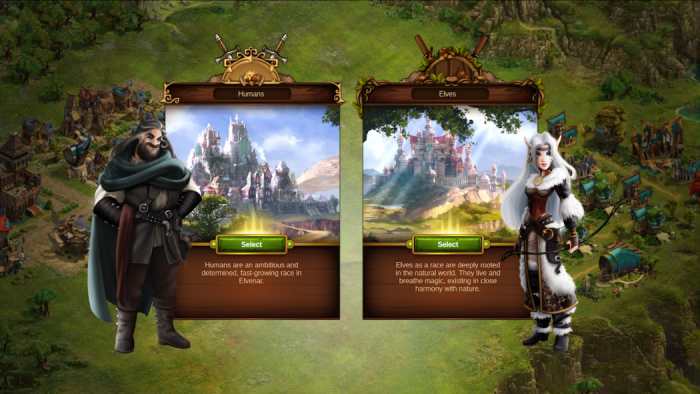
Subito dopo aver registrato un account ed essere entrato in un mondo (server di gioco), ti verrà chiesto di scegliere se vuoi giocare come Elfo o Umano. | |||
[[File:Race_Selection_New.png|700px|center]] | |||
Il modo di giocare è simile per entrambe le razze ma la tua scelta influenzerà alcuni tratti principali: | |||
# L’aspetto della tua città dipenderà dalla razza per cui hai optato. Gli Elfi sono esseri magici, vivono in sintonia con la natura. I loro edifici saranno molto sofisticati. Gli Umani sono molto ambiziosi e determinati, portandoli verso uno stile più medioevale ed industrializzato. | |||
# Anche le [[Unità|unità militari]] a tua disposizione saranno differenti. Per esempio, gli Elfi si baseranno, tra gli altri, sui Treant e gli Umani sui barbari con ascia. | |||
Quando ci saranno ulteriori mondi (server di gioco) potrai provare a giocare anche con l’altra razza. | |||
=== Mappa della città === | |||
= | |||
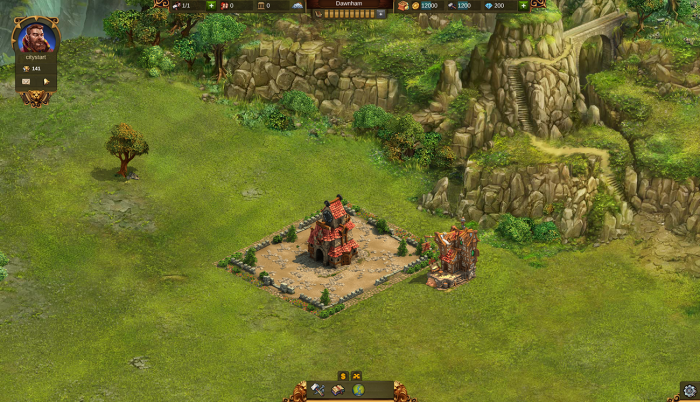
All’inizio avrai a disposizione un’area limitata per costruire la tua città. La piantina è suddivisa in mattonelle sulle quali potrai piazzare i tuoi primi edifici, così da sviluppare la città. Inizierai con un’area di 15x10 mattonelle. | |||
[[File:city_start_human.png|700px|center]] | |||
Ma certo il tuo obiettivo principale è quello di espanderti e la sfida è ottenere il massimo da quanto a tua disposizione. Per aumentare l’area edificabile puoi sbloccare espansioni nell’albero della ricerca, ottenerle concludendo un incontro in una provincia, o acquistando espansioni Premium. Ogni espansione è composta da 25 mattonelle (5x5). | |||
All’inizio, troverai due edifici già presenti sulla mappa: Il municipio e la baracca dei costruttori. | |||
*Il '''[[Municipio|municipio]]''' è il centro della tua città e fa da magazzino principale. Quasi tutti gli edifici, per funzionare, hanno bisogno di strade che li collegano al municipio. | |||
*Nella '''[[Baracca dei costruttori|baracca dei costruttori]]''' troverai i tuoi costruttori. Ti aiuteranno a costruire e migliorare gli edifici, oltre a gestire le tue attuali costruzioni. | |||
=== Risorse essenziali === | |||
Ci sono due risorse essenziali in Elvenar che ti aiuteranno a far crescere la tua città: | |||
[[File:HUDbasic.png|center|Barra superiore, risorse disponibili]] | |||
*Monete: Le monete vengono prodotte automaticamente dalle [[Residenza|'''Residenze''']] con il passare del tempo. | |||
*Materiali: Per produrre materiali devi ordinarli al [[Laboratorio|''Laboratorio'']]. Ogni tipo di produzione richiede un tempo di produzione differente. | |||
[[ | |||
[[ | |||
{|align="center" cellpadding="1" width="100%" | {|align="center" cellpadding="1" width="100%" | ||
|style="background-color:#af895f;|'''Consiglio:''' Appena pronte puoi raccogliere tutte le tue produzioni nello stesso momento! Devi solo cliccarene una e trascinare il mouse sulle altre. | |||
|} | |} | ||
= | === Primi passi === | ||
[[File:mentor_elves.png|right|link=]] | |||
All’inizio del gioco dovrai fare attenzione a tre particolari: | |||
Primo, '''non puoi avere una città senza abitanti (popolazione)'''. | |||
Quando inizi a costruire la città, dovresti innanzitutto costruire un paio di residenze. Ti assicureranno la popolazione necessaria e genereranno entrata di monete. Molti degli edifici che vorrai costruire richiedono abitanti che ci possano lavorare, e le costruzioni costano monete, che le residenze genereranno. Ti raccomandiamo di costruire almeno otto residenze all’inizio. Sono economiche e si costruiscono velocemente. Ma non dimenticarti di collegarle al municipio utilizzando le strade. | |||
Secondo, '''devi iniziare a produrre materiali non appena le tue residenze saranno pronte'''. | |||
Sono risorse di grande valore, utilizzate per costruire certi edifici, e più tardi per produrre beni e reclutare il tuo esercito. I materiali possono essere prodotti nei laboratori, pertanto ti consigliamo di costruirne almeno tre non appena le prime residenze saranno pronte. Con sufficienti monete e materiali, il nucleo della tua economia è avviato. | |||
E terzo, '''in città ti serviranno [[Cultura|edifici culturali]].''' Questo ti permetterà di migliorare gli altri edifici e produrre con la massima efficienza. Il tuo spazio in città è limitato e lo sarà sempre. Quindi, migliorare gli edifici per migliorarne le proprietà è la chiave giusta per ottenere il massimo nel minimo spazio. Per migliorare, ti serviranno molte monete e materiali così come abitanti e [[Cultura|cultura]]. Pertanto, per far crescere la tua città, fai in modo di avere sempre un’adeguata eccedenza di cultura. | |||
Se avete disponibile più [[Cultura|cultura]] rispetto a quanto richiesto per i miglioramenti, i tuoi cittadini saranno felici e produrranno più efficientemente. In un certo senso, questo sarà il modo più economico per ottenere più monete e materiali. Ma non esagerare! Non ha senso avere una città piena di [[Cultura|edifici culturali]] ma senza [[Residenza|residenze]] dove vivere. | |||
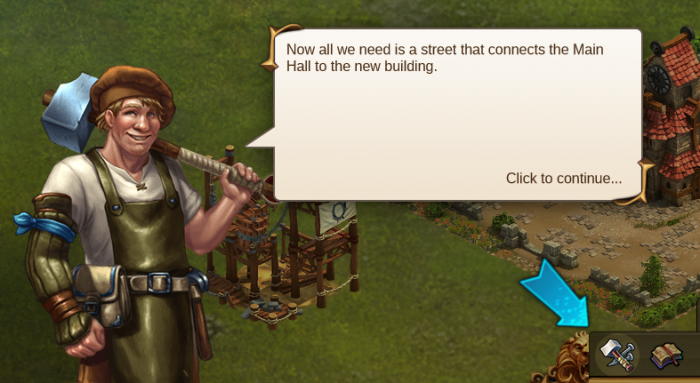
Per rendere tutto più semplice, basta semplicemente seguire la guida che ti mostrerà questi primi passi e come iniziare a creare la tua città: | |||
[[File:Begin1.png|center|700px]]<br> | |||
[[File:Guide1.png|center|700px]] | |||
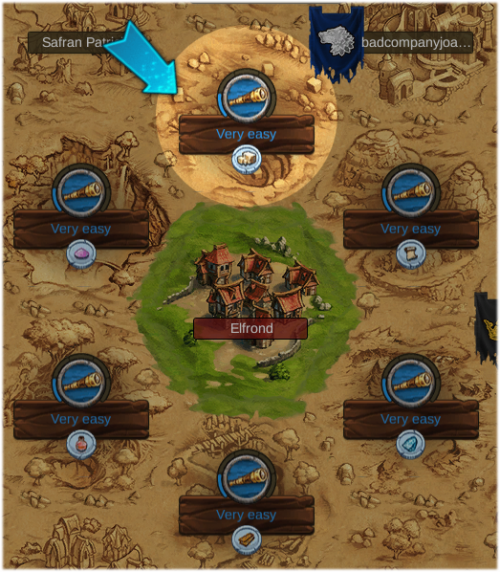
Una volta che la tua città inizia a crescere, diventa il momento giusto per andare nella [[Mappa del mondo|'''Mappa del mondo''']] dove puoi vedere i tuoi Vicini, "esplorare" Province, sperimentare gli "Incontri" ed iniziare a raccogliere oggetti come Cimeli e Punti Conoscenza. | |||
[[File:Worldmap1.png|center|500px]] | |||
====Le prime missioni==== | |||
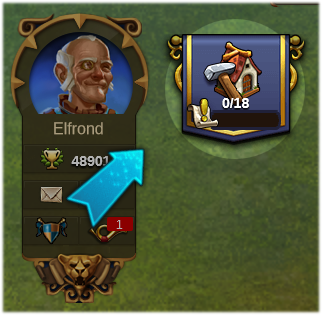
Per proseguire la tua esperienza in gioco ed aiutarti a costruire la tua città, ti sarà chiesto di di completare una serie di semplici missioni: | |||
[[File:Firstquests1.png|center]] | |||
[[File:Firstquestwindow1.png|center|700px]] | |||
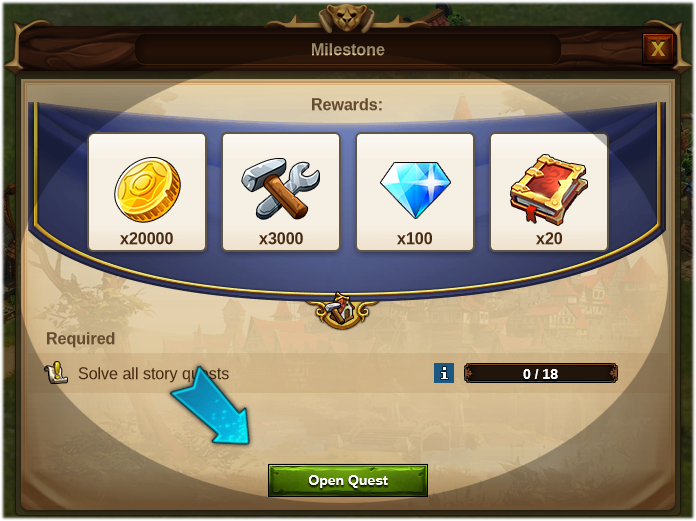
Completale tutte per ottenere super premi per iniziare! | |||
Ed ecco giunto l’ultimo consiglio per i principianti: '''Ascolta i tuoi consiglieri!''' Se completi regolarmente le missioni, verrai ricompensato generosamente, e sarà più semplice per te avanzare nel gioco. | |||
Versione attuale delle 17:25, 21 mag 2020
Razze
Subito dopo aver registrato un account ed essere entrato in un mondo (server di gioco), ti verrà chiesto di scegliere se vuoi giocare come Elfo o Umano.
Il modo di giocare è simile per entrambe le razze ma la tua scelta influenzerà alcuni tratti principali:
- L’aspetto della tua città dipenderà dalla razza per cui hai optato. Gli Elfi sono esseri magici, vivono in sintonia con la natura. I loro edifici saranno molto sofisticati. Gli Umani sono molto ambiziosi e determinati, portandoli verso uno stile più medioevale ed industrializzato.
- Anche le unità militari a tua disposizione saranno differenti. Per esempio, gli Elfi si baseranno, tra gli altri, sui Treant e gli Umani sui barbari con ascia.
Quando ci saranno ulteriori mondi (server di gioco) potrai provare a giocare anche con l’altra razza.
Mappa della città
All’inizio avrai a disposizione un’area limitata per costruire la tua città. La piantina è suddivisa in mattonelle sulle quali potrai piazzare i tuoi primi edifici, così da sviluppare la città. Inizierai con un’area di 15x10 mattonelle.
Ma certo il tuo obiettivo principale è quello di espanderti e la sfida è ottenere il massimo da quanto a tua disposizione. Per aumentare l’area edificabile puoi sbloccare espansioni nell’albero della ricerca, ottenerle concludendo un incontro in una provincia, o acquistando espansioni Premium. Ogni espansione è composta da 25 mattonelle (5x5). All’inizio, troverai due edifici già presenti sulla mappa: Il municipio e la baracca dei costruttori.
- Il municipio è il centro della tua città e fa da magazzino principale. Quasi tutti gli edifici, per funzionare, hanno bisogno di strade che li collegano al municipio.
- Nella baracca dei costruttori troverai i tuoi costruttori. Ti aiuteranno a costruire e migliorare gli edifici, oltre a gestire le tue attuali costruzioni.
Risorse essenziali
Ci sono due risorse essenziali in Elvenar che ti aiuteranno a far crescere la tua città:
- Monete: Le monete vengono prodotte automaticamente dalle Residenze con il passare del tempo.
- Materiali: Per produrre materiali devi ordinarli al Laboratorio. Ogni tipo di produzione richiede un tempo di produzione differente.
| Consiglio: Appena pronte puoi raccogliere tutte le tue produzioni nello stesso momento! Devi solo cliccarene una e trascinare il mouse sulle altre. |
Primi passi
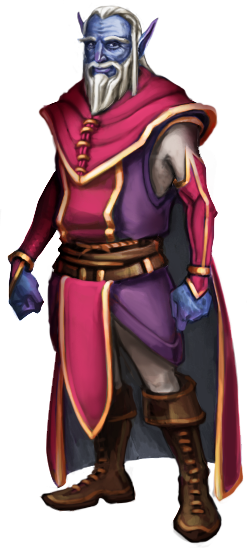
All’inizio del gioco dovrai fare attenzione a tre particolari:
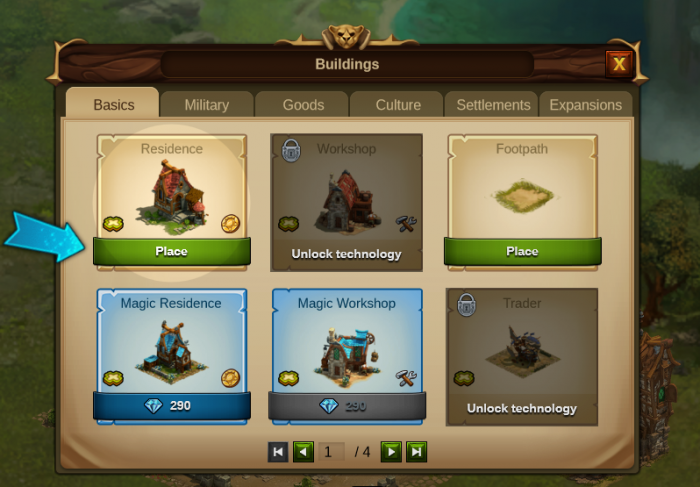
Primo, non puoi avere una città senza abitanti (popolazione). Quando inizi a costruire la città, dovresti innanzitutto costruire un paio di residenze. Ti assicureranno la popolazione necessaria e genereranno entrata di monete. Molti degli edifici che vorrai costruire richiedono abitanti che ci possano lavorare, e le costruzioni costano monete, che le residenze genereranno. Ti raccomandiamo di costruire almeno otto residenze all’inizio. Sono economiche e si costruiscono velocemente. Ma non dimenticarti di collegarle al municipio utilizzando le strade.
Secondo, devi iniziare a produrre materiali non appena le tue residenze saranno pronte. Sono risorse di grande valore, utilizzate per costruire certi edifici, e più tardi per produrre beni e reclutare il tuo esercito. I materiali possono essere prodotti nei laboratori, pertanto ti consigliamo di costruirne almeno tre non appena le prime residenze saranno pronte. Con sufficienti monete e materiali, il nucleo della tua economia è avviato.
E terzo, in città ti serviranno edifici culturali. Questo ti permetterà di migliorare gli altri edifici e produrre con la massima efficienza. Il tuo spazio in città è limitato e lo sarà sempre. Quindi, migliorare gli edifici per migliorarne le proprietà è la chiave giusta per ottenere il massimo nel minimo spazio. Per migliorare, ti serviranno molte monete e materiali così come abitanti e cultura. Pertanto, per far crescere la tua città, fai in modo di avere sempre un’adeguata eccedenza di cultura. Se avete disponibile più cultura rispetto a quanto richiesto per i miglioramenti, i tuoi cittadini saranno felici e produrranno più efficientemente. In un certo senso, questo sarà il modo più economico per ottenere più monete e materiali. Ma non esagerare! Non ha senso avere una città piena di edifici culturali ma senza residenze dove vivere.
Per rendere tutto più semplice, basta semplicemente seguire la guida che ti mostrerà questi primi passi e come iniziare a creare la tua città:
Una volta che la tua città inizia a crescere, diventa il momento giusto per andare nella Mappa del mondo dove puoi vedere i tuoi Vicini, "esplorare" Province, sperimentare gli "Incontri" ed iniziare a raccogliere oggetti come Cimeli e Punti Conoscenza.
Le prime missioni
Per proseguire la tua esperienza in gioco ed aiutarti a costruire la tua città, ti sarà chiesto di di completare una serie di semplici missioni:
Completale tutte per ottenere super premi per iniziare!
Ed ecco giunto l’ultimo consiglio per i principianti: Ascolta i tuoi consiglieri! Se completi regolarmente le missioni, verrai ricompensato generosamente, e sarà più semplice per te avanzare nel gioco.
